You are browsing camaro5 
|
|
 10-02-2012, 11:16 AM
|
#29 |
Drives: 2013 GRAND SPORT (aka: EREBUS) Join Date: Sep 2012
Location: Arkansas
Posts: 143
|
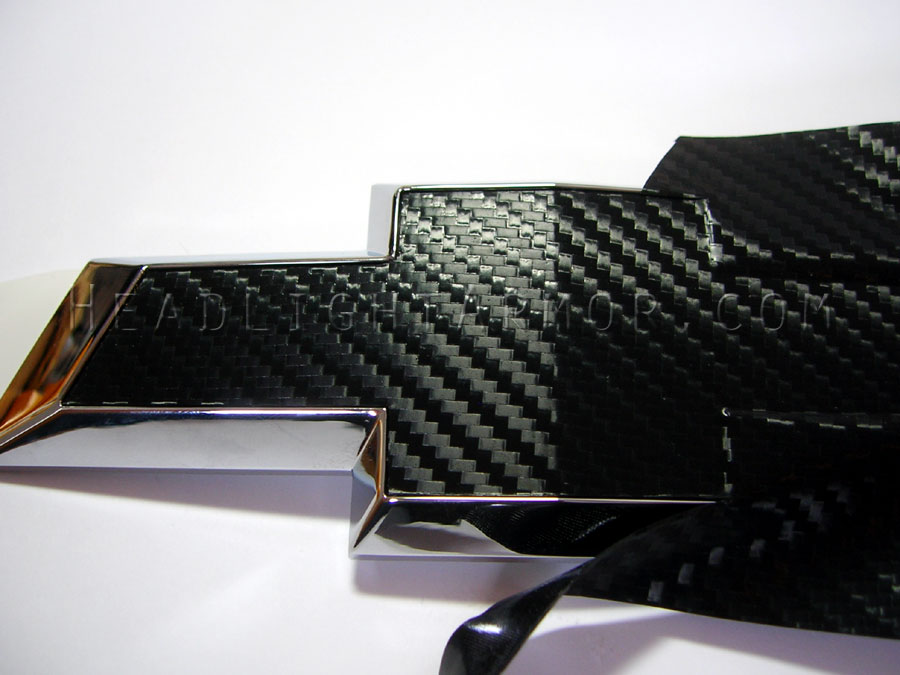
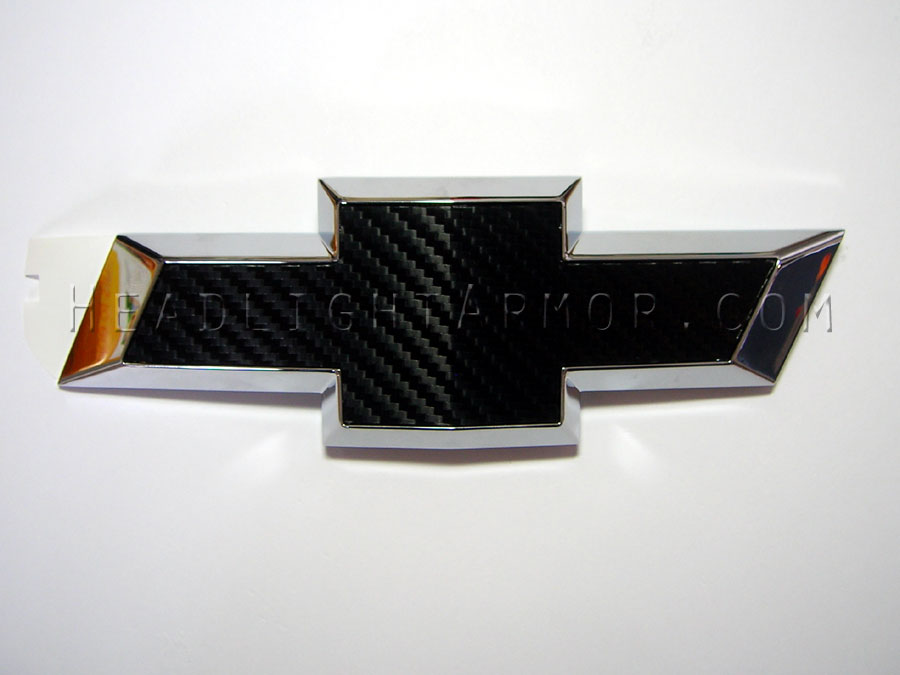
Gonna try the sample on something! Order number 16908 submitted but wouldn't create an account.
Do you accept Paypal payments for new orders? How much wrap do I need to do the bow-ties? Price? Does it match the oem CF insert on the ZL1? How much to stripe the top and rear deck lid to match the CF insert and to do the area around the license plate? Last edited by Speedforhire; 10-02-2012 at 11:32 AM. |

|

|
|
10-02-2012, 05:42 PM
|
#30 | ||
Drives: Company Car Join Date: Sep 2009
Location: headlightarmor.com
Posts: 3,535
|
Quote:
 with the sample you can try applying it on something, though not big enough to do the whole bow tie. Quote:
|
||
|
|
|
|
10-03-2012, 08:44 AM
|
#31 |
|
Drives: 2013 GRAND SPORT (aka: EREBUS) Join Date: Sep 2012
Location: Arkansas
Posts: 143
|
Just got my order in! It should look great on the black car with the CF hood insert.
Thx for this tutorial! |
|
|
|
|
03-11-2014, 03:16 PM
|
#32 |
Drives: 2014 1LS BRM Join Date: Jan 2014
Location: San Diego
Posts: 231
|
Did a search and found this thread. Very help full. Even tho it is super old.
__________________
Mods: MRT V2 Exhaust, CAI Intake, BMR Strut Tower Brace, Vmaxx PTB, Elite Catch can Next Mod:SOLO HFC, Lowering springs |
|
|
|
|
03-11-2014, 10:13 PM
|
#33 |
|
Drives: Company Car Join Date: Sep 2009
Location: headlightarmor.com
Posts: 3,535
|
Glad you found it helpful!
|
|
|
|
|
04-01-2014, 03:41 PM
|
#34 | |
Drives: Wife's 14' IS 250 Join Date: Mar 2014
Location: PSL, FL
Posts: 2,207
|
Quote:
That's why my front & back badges both came out like trash :( I used a brand new carpet utility knife! I'm gonna order more vinyl & this time try with an 'exacto' knife instead. Sent from my iPhone using Tapatalk
__________________
2016 Camaro HBM A8, 2SS, NPP, Sunroof, Kalahari Interior/kneepads, Black bowties, 56v:
-11% tint all around Ordered 2/06/16 Built on 3/22/16 Adopted 4/07/16 Sold on 2/05/16: 2014 Camaro SW L99, 2SS, RS, NAV, Inferno Orange Interior: -Borla ATAK catback -Range AFM delete -15% tint all around -Red LED interior bulbs -55k white Cree LED fogs -License plate LED bulb swap -12" Sub Kit, BA amp swap -Oracle ghosted LED sidemarkers |
|
|
|
|
|
04-01-2014, 04:16 PM
|
#35 |
|
Drives: Company Car Join Date: Sep 2009
Location: headlightarmor.com
Posts: 3,535
|
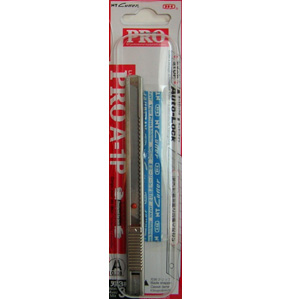
Yes, the sharper the knife the better! We use these:
|
|
|
|
|
05-12-2014, 08:12 AM
|
#36 |
 |
Any tips on what angle to cut with the razor?
My first attempt on the rear bowtie (basically flat) left some gold visible around the edges. My angle of my blade was perpendicular to the bowtie inside the gaps to avoid cutting up into the chrome or down into the gold section. Would it make more sense to angle it towards the inside of the chrome section to allow for more material to wrap around into those grooves? |
|
|
|
|
05-12-2014, 03:32 PM
|
#37 | ||
|
Drives: Company Car Join Date: Sep 2009
Location: headlightarmor.com
Posts: 3,535
|
Quote:
Quote:
|
||
|
|
|
|
06-27-2014, 02:43 PM
|
#38 |
 
Drives: 2014 ZL1 SIM Join Date: Feb 2014
Location: Reno,NV
Posts: 49
|
Sorry if this is re-opening an old thread but maybe it will be valuable to 2014 owners.
I too wanted to wrap my front bowtie (rear bowtie deleted) and especially the steering wheel bowtie (scroll down to H P Turbine to see wrapped steering wheel bowtie). So I order the wrap and the super sharp knife ($10.95). When I reiceved it I ask my main sales guy if he could help me do this. He said, I have a friend that had worked for the largest wrapping company in Reno... Graphics Unlimited for five years. They do city buses, all the casino airport shuttles, etc. He shows up, takes a look at the front bowtie and say's I'll get my tools. I said, I have this brand new knife, he say's thats OK I have my tools. He walks back in with a few tools in one hand and a TORCH in the other! My guy say's... yea, when he did my new Subaru STI to completely debadge it he brings out this torch and my guy say's what the *%#@* are you going to do with that? He say's don't worry it's much faster. I went to answer a quick phone call and when I returned the front bowtie was already done and he is sitting in the drivers seat. He calls me around to him and say's you can't wrap this steering wheel bowtie, it's not smooth, it's very textured. This will be at least the fourth mod that I had pre-planned while waiting on my 2014 car to come in that either didn't fit right, didn't work as explained, or in this case is not possible (according to a pro). He even said, I can cut you a template to paint it but wrap is not going to stick to that. So, did GM actually change the frigging steering wheel bowtie gold texture for 2014? |
|
|
|
|
06-27-2014, 03:40 PM
|
#39 |
|
Drives: Wife's 14' IS 250 Join Date: Mar 2014
Location: PSL, FL
Posts: 2,207
|
2014 Textured = All bowties except the ones on the wheels.
Sent from my iPhone using Tapatalk
__________________
2016 Camaro HBM A8, 2SS, NPP, Sunroof, Kalahari Interior/kneepads, Black bowties, 56v:
-11% tint all around Ordered 2/06/16 Built on 3/22/16 Adopted 4/07/16 Sold on 2/05/16: 2014 Camaro SW L99, 2SS, RS, NAV, Inferno Orange Interior: -Borla ATAK catback -Range AFM delete -15% tint all around -Red LED interior bulbs -55k white Cree LED fogs -License plate LED bulb swap -12" Sub Kit, BA amp swap -Oracle ghosted LED sidemarkers |
|
|
|
|
09-02-2014, 08:42 PM
|
#40 |
|
KaBoom1701
Drives: 13' ZL1 Red M6 Join Date: Dec 2012
Location: I.E. SoCal (Yucaipa)
Posts: 8,630
|
Just bought some of this CF wrap.
Hopefully I don't screw it up. lol Such a cost effective mod I can't believe I waited this long.
__________________
Mods:
Roto-Fab Intake, WW Res. kit & Big Gulp Air Scoop, Elite Catch Can, ATI Super Damper & 18% OD Pulley, LF Idler pulley bracket, Metco CC breather, ID850 Injectors, Stainless Power Headers w/ ceramic coating, TR71X Spark Plugs, JMS Fuel Pump Booster, Bo White TB, Tuned by Ted @ Jannetty Racing, Ron Davis HX, D3 Reservoir, Pfadt 1" Springs, Moreno Camber Plates, ZL1 Addons Splitter guard washers, Tow Hook kit & rock guards, Hurst Shifter Billet Plus 6 Speed Short Shifter, ZL1 DRL lighting harness, ZL1 Recaro Seats. |
|
|
|
|
|
|
|
 |
|
|
 Similar Threads
|
||||
| Thread | Thread Starter | Forum | Replies | Last Post |
| 2009 2010 Camaro SS prototype in silver (6/21) | Mr. Wyndham | Camaro Photos | Spyshots | Video | Media Gallery | 387 | 09-16-2009 09:16 AM |
| Orange Camaro Animation With Stills & Download | Steven Simply | Camaro Photos | Spyshots | Video | Media Gallery | 23 | 05-17-2008 10:32 AM |
| A word about pics - past/present/future... | fbodfather | Camaro Photos | Spyshots | Video | Media Gallery | 43 | 04-01-2008 01:34 PM |
| Props to Dragoneye | Just a Skidmark | General Automotive + Other Cars Discussion | 29 | 08-21-2007 11:31 PM |
| The camaro should come out this year | bobbyhhh | 5th Gen Camaro SS LS LT General Discussions | 44 | 01-18-2007 11:18 AM |